I. Game Background
1.1 Setting the Scene
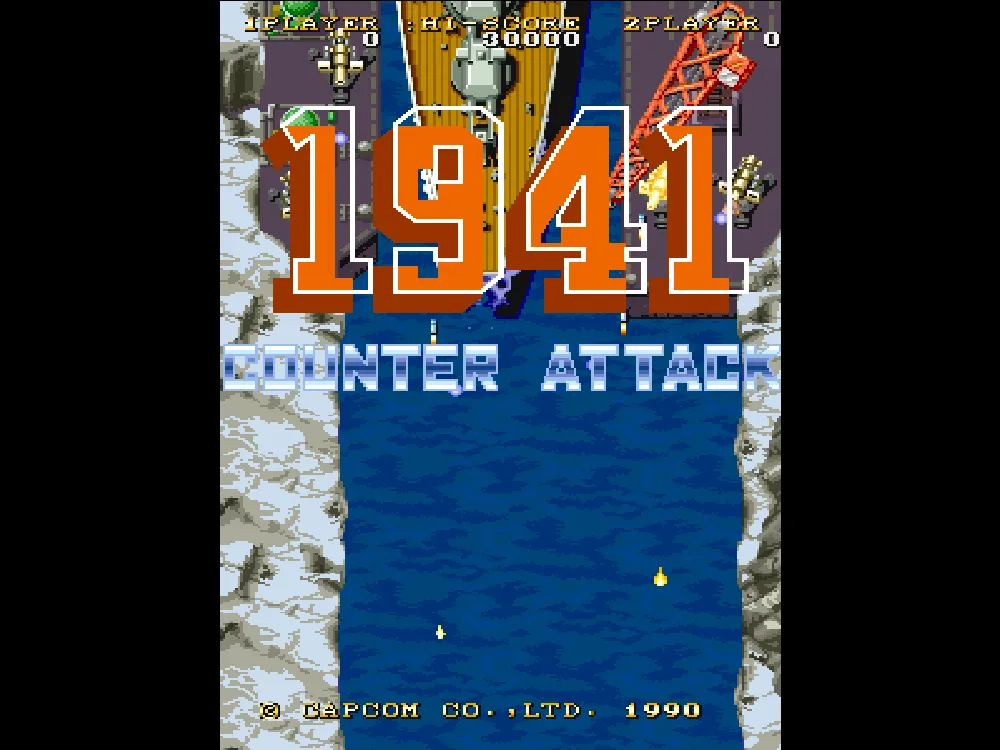
1941: Counter Attack shifts the theater of war from the Pacific front of the previous 194X titles to the Western Front in the North Atlantic. The year is 1941—a pivotal turning point in World War II—where Allied forces face a fierce Axis offensive. Players pilot the most elite Allied fighters, taking off from aircraft carriers to strike deep behind enemy lines.
While the narrative is concise, the level design is a love letter to WWII history: the icy waters of the North Atlantic, the iron torrent of the Luftwaffe, U-boats lurking beneath the waves, and the impregnable Axis sea fortress in the final showdown. Every stage is an aerial expedition that begins on a carrier deck, pushes through dense anti-aircraft fire, and culminates in the destruction of massive enemy war machines.
1.2 Development History
1941: Counter Attack was first released by Capcom in Japan in February 1990, marking the first vertical shooter in the 194X series to run on the CPS-1 (CP System) arcade hardware. The game was directed by legendary Capcom producer Yoshiki Okamoto, with design by Akira Nishitani, Noritaka Funamizu, and Toshihiko Uda. Yoshihiro Shindome served as the lead programmer, and the soundtrack was composed by Hiromitsu Takaoka.
The 194X timeline is quite intriguing: despite the numbering, the release order was 1942 → 1943: The Battle of Midway → 1941: Counter Attack (a prequel) → 19XX: The War Against Destiny → 1944: The Loop Master. In other words, the game with the lowest number, 1941, is actually the prequel, covering the North Atlantic campaign that predates the Pacific theater of 1942.
The CPS-1 hardware allowed for smooth vertical scrolling and multi-layered parallax effects, with visual detail far surpassing 8-bit shooters of the era. In August 1991, Hudson Soft ported the game to the NEC SuperGrafx console, making it one of the few arcade-perfect shooters on the system. In 2021, the game was released as part of the second volume of the Capcom Arcade Stadium collection for Nintendo Switch, allowing a new generation of players to experience this classic.
II. Fighter Introduction
In 1941: Counter Attack, players don't control "characters" but rather pilot two distinct WWII-era fighter planes. Their performance and weapon trajectories differ significantly, and your choice will directly influence your gameplay strategy.
P-38 Lightning — 1P
| Attribute | Rating |
|---|---|
| Firepower | ★★★★☆ |
| Speed | ★★★☆☆ |
| Range | ★★★☆☆ |
| Difficulty | ★★★☆☆ |
- Pros: The primary weapon is a focused cannon with high single-target output, making it excellent for boss fights.
- Cons: The narrow trajectory makes it less efficient at clearing large groups of scattered enemies.
- Summary: Ideal for beginners and boss-hunting specialists. As the legendary American ace fighter of WWII, the P-38 is known for its twin-boom design and endurance—the game captures its "precision sniper" combat style perfectly.
DH.98 Mosquito — 2P
| Attribute | Rating |
|---|---|
| Firepower | ★★★☆☆ |
| Speed | ★★★★☆ |
| Range | ★★★★☆ |
| Difficulty | ★★★★☆ |
- Pros: The primary weapon fires in a wide spread, offering excellent screen coverage for clearing out smaller enemies. The special weapon is a wide-area bomb, perfect for dense bullet patterns.
- Cons: The spread trajectory means lower single-target DPS compared to the P-38, requiring more precise positioning during boss fights.
- Summary: Best suited for veterans with experience in bullet-hell games. The Mosquito was one of Britain's most famous multi-role aircraft, known for its wooden construction, high speed, and versatility—the game's spread shot reflects its multi-purpose nature.
III. Controls
3.1 Basic Controls
| Button | Action | Description |
|---|---|---|
| Joystick ↑↓←→ | Move | 8-way movement, standard vertical shooter controls |
| A Button | Shoot | Continuous fire with your equipped primary weapon |
| B Button | Mega Crash | Screen-clearing attack that deals heavy damage; consumes health energy |
3.2 Advanced Mechanics
Vitality System
Unlike the "one-hit-kill" mechanic of traditional shooters, 1941: Counter Attack uses a unique fuel-tank health system. Each hit consumes a portion of your vitality; once it's depleted, your plane crashes, and you must use a continue. This adds a layer of tactical depth—sometimes "taking a hit to gain positioning" is a valid strategy.
Loop System
Each stage can be "looped" up to three times. Looping effectively allows you to replay the stage for higher scores. Unused loops at the end of a stage are converted into bonus points. It's a risk-reward mechanic: more loops mean more points, but also more ammo consumption and danger.
Continue Counter
1941: Counter Attack was the first arcade game in history to add +1 to the score upon continuing. This minor detail is significant: it allows players to see exactly how many times a player continued on the high-score board. A true "1CC" (One Credit Clear) score will have no continue mark. This became the standard for countless shooters that followed.
IV. Stage Walkthrough & Boss Strategy
1941: Counter Attack consists of 6 stages. Since Capcom never officially named the stages, we use common names based on the North Atlantic geography.
4.1 Stage 1: Carrier Takeoff — North Atlantic
| Item | Content |
|---|---|
| Setting | Take off from an Allied carrier deck over the icy North Atlantic. Enemies are primarily Luftwaffe Bf 109 formations, with anti-aircraft fire from enemy destroyers. |
| Boss | Steel Vulture—A massive four-engine heavy bomber bristling with turrets and escorted by fighters. |
| Strategy | A tutorial-level boss. The turrets fire in a fixed rhythm with clear gaps. Destroy wing turrets first to reduce bullet density, then focus fire on the cockpit (the weak point). Stay in the lower-middle of the screen. |
4.2 Stage 2: Channel Breakthrough — English Channel
| Item | Content |
|---|---|
| Setting | Fly over the English Channel, facing coastal artillery and V-1 rockets. Torpedo boats launch homing torpedoes that require early evasion. |
| Boss | Armored Railgun—A super-heavy train gun traveling at high speed along the coast. |
| Strategy | The train moves fast, but its attack pattern is rhythmic: main gun volley → cooldown → machine gun sweep. Attack during the cooldown. The S (Spread) weapon is excellent here for hitting multiple cars at once. |
4.3 Stage 3: Submarine Hunt — Deep North Atlantic
| Item | Content |
|---|---|
| Setting | Dark skies and rough seas. German U-boats surface suddenly, firing homing torpedoes and anti-air rockets. |
| Boss | Wolfpack Mothership—A giant U-boat with deck turrets and torpedo tubes that fire six homing missiles at once. |
| Strategy | Difficulty begins to climb. Don't try to dodge the homing torpedoes—use a Mega Crash to clear them. Target the bridge (conning tower) and torpedo tubes. |
4.4 Stage 4: Steel Fortress — Occupied Territory
| Item | Content |
|---|---|
| Setting | Deep inside occupied Europe. Dense bunkers, tank columns, and Me 262 jet fighters. This is the stage with the highest bullet density. |
| Boss | Land Battleship—A massive tracked land fortress with heavy artillery and rocket launchers. |
| Strategy | Heavily armored front. The safest spot is the bottom corners. M (Missile) weapons are best here to keep damage on the boss while you focus on dodging. Save Mega Crash for the second half of the fight. |
4.5 Stage 5: High-Altitude Interception — Stratosphere
| Item | Content |
|---|---|
| Setting | Combat in the stratosphere. The background shifts to blue skies above the clouds. Enemies appear in precise formations. |
| Boss | Aerial Fortress—A super-sized flying wing bomber with rotating turrets and missile launchers. |
| Strategy | The rotating turrets create spiral patterns—stay in the bottom-center of the screen. Prioritize destroying the wing-tip missile launchers, as they track your position. |
4.6 Stage 6: Final Showdown — Axis Sea Fortress
| Item | Content |
|---|---|
| Setting | The final stage—the absolute defensive perimeter of the Axis forces. A massive floating fortress of warships and concrete bunkers. |
| Boss | Final Fortress Core—A multi-layered fortress. Phase 1: Destroy the four outer turret groups. Phase 2: The core exposes itself, firing spiral patterns, homing missiles, and sweeping lasers. |
| Strategy | A test of resource management. Save at least 2 Mega Crashes for the final phase's laser sweep, which is the deadliest attack in the game. |
V. Tips & Advanced Strategy
5.1 Survival Tips
- Use your health bar: Unlike one-hit-kill games, you can afford to take 1-2 hits to reach a better position. Just don't let your energy drop below 1.
- M (Missile) is for mobs: Use homing missiles to clear small enemies so you can focus on dodging.
- S (Spread) is for bosses: Full-power Spread shots hit multiple boss parts simultaneously.
- Mega Crash for survival, not damage: Use it to clear the screen when you're trapped, not just to deal damage.
- Learn the rhythm: Every boss has a fixed cycle. Spend the first 10 seconds observing before attacking.
- Don't ignore ground targets: They often drop score items or energy refills.
5.2 Co-op Tips
- Divide and conquer: 1P (P-38) focuses on bosses; 2P (Mosquito) focuses on clearing mobs.
- Stagger Mega Crashes: Don't use them at the same time. Coordinate to keep the screen clear.
- Keep your distance: Don't crowd each other; hitboxes are independent.
- Share resources: Give M weapons to 2P and power-ups to 1P.
5.3 Boss Rules
- First 10 seconds: Dodge only. Observe the pattern.
- Look for glowing parts. That's where the weak points are.
- Mega Crash at half health. That's when bosses usually go berserk.
- Move forward in dense patterns. It's often easier to slip through gaps closer to the source.
- Don't get greedy. Stay calm for the last 10% of health.
5.4 Advanced Knowledge
- Loop Math: You can loop up to 3 times, but bullets get faster each time. For high scores, 3 loops in the first two stages are safe; 1-2 in later stages.
- "Suicide Clear": If your health is low and you're near a score threshold, some players intentionally crash to get a full health bar on the next life.
- Hidden Items: Certain ground spots contain hidden gold and score items. Memorizing these is key to high scores.
- SuperGrafx Port: Slightly lower frame rate but unique audio mixing that some prefer over the arcade original.
- Continue +1: The birth of the 1CC (One Credit Clear) culture.