I. Game Background
1.1 Setting the Scene
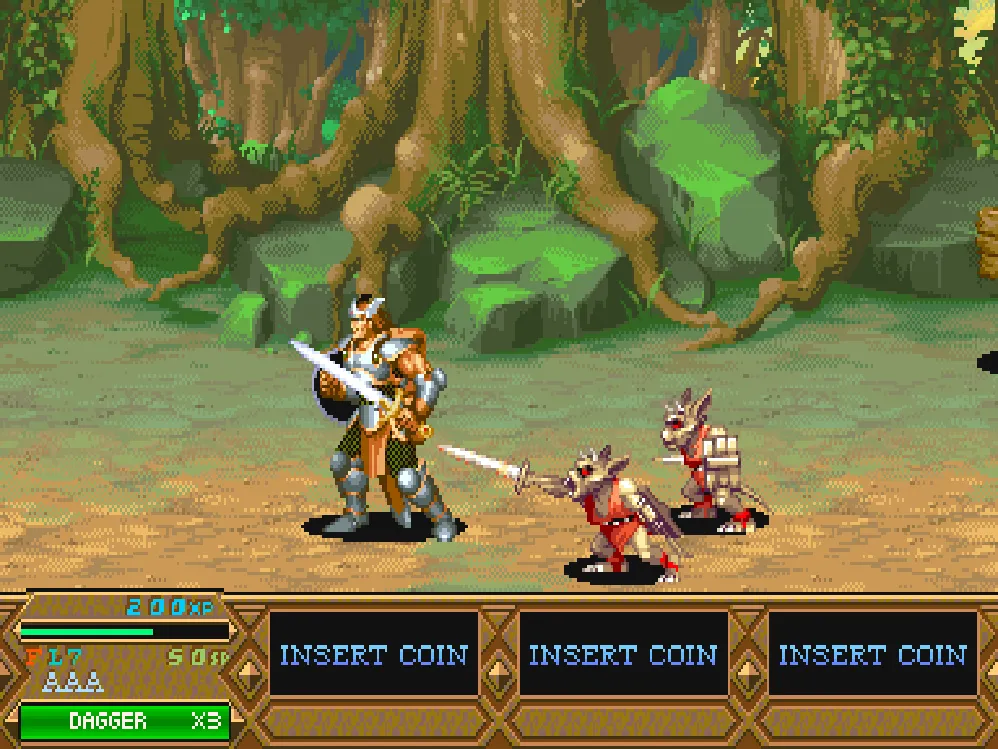
Dungeons & Dragons: Tower of Doom takes place in the Republic of Darokin, a region within the D&D Mystara campaign setting. This prosperous hub of trade is suddenly besieged by a massive wave of monsters, leaving villages in ruins and trade routes severed. A wealthy local merchant named Corwyn Linton recruits four adventurers to investigate the truth behind the catastrophe.
As the adventure unfolds, the party discovers that the source of the chaos is the Tower of Doom—a forbidden spire shrouded in dark magic. The tower is ruled by the Archlich Deimos, an ancient necromancer who seeks to destroy Darokin and conquer all of Mystara by unleashing his monster legions. The four heroes must scale the tower and face Deimos in a final showdown at the summit.
1.2 Development History
Released by Capcom in 1993 for the CPS-2 arcade hardware, Tower of Doom was the first officially licensed Dungeons & Dragons arcade game. Capcom secured the license from TSR in the early 1990s, a deal that also included porting Eye of the Beholder to the Super Nintendo. Due to communication hurdles between the Japanese branch and TSR, Capcom USA spearheaded the negotiations.
In January 1992, Capcom and TSR established a design principle: "Write the story first, then build the game around it." Veteran D&D player Alex Jimenez was brought on to write the script, using his own San Jose gaming group as playtesters. He acted as the DM, and the Capcom Japan team iterated on the design based on their feedback. The game drew inspiration from the feel of Golden Axe and the branching paths of Thayer's Quest. The design team included Tomoshi Sadamoto and George Kamitani, with art by Kinu Nishimura and a collaborative score by Isao Abe, Takayuki Iwai, and Hideki Okugawa.
II. Character Classes
There are four playable classes, each with distinct combat styles and skill sets.
| Class | Weapon | Reach | Special Ability | Magic |
|---|---|---|---|---|
| Fighter | Longsword | Longest | Somersault attack (unarmed) | None |
| Elf | Shortsword | Medium | Can use magic rings | 7 Arcane Spells |
| Cleric | Mace | Short | Turn Undead; Shield block vertical attacks | 5 Divine Spells |
| Dwarf | Battle Axe | Shortest (Horizontal) | Double swing speed; Spinning axe attack (unarmed) | None |
The Fighter is the most balanced character, boasting the longest attack range and highest HP. They cannot use magic, making inventory management straightforward.
The Elf is the only female character, functioning similarly to a Red Mage—capable of both melee combat and spellcasting. She has access to all seven arcane spells: Magic Missile, Invisibility, Fireball, Lightning Bolt, Polymorph Other, Ice Storm, and Cloudkill. Fireball and Lightning Bolt are devastating against crowds, while Cloudkill deals significant damage to bosses over time.
The Cleric wields a mace—his religious vows forbid bladed weapons. While his reach is short, he possesses unique support abilities. His five divine spells include Hold Person, Bless, Continual Light, Striking, and Cure Serious Wounds. He is the only character who can Turn Undead and is the best at shield blocking, capable of parrying vertical attacks that others cannot.
The Dwarf has the shortest horizontal reach, but his swing speed is incredible—his first three hits are nearly twice as fast as other characters, making him a powerhouse in close-quarters combat. When his inventory is empty, his jump attack becomes a spinning axe strike that hits twice in the air and once upon landing.
III. Controls and Gameplay
3.1 Basic Controls
Tower of Doom uses a four-button layout with an eight-way joystick, making it one of the most mechanically deep beat-'em-ups of its era. Capcom originally planned for two buttons but expanded to four to accommodate the item and defense systems.
| Button | Function | Description |
|---|---|---|
| A (Attack) | Normal Attack | Press repeatedly for combos; combine with directional inputs for dash attacks or back-slashes |
| B (Jump) | Jump | Press A while jumping for a jump attack |
| C (Item/Magic) | Use Item/Spell | Open inventory to select throwing weapons, magic rings, or potions |
| D (Defense) | Block/Crouch | Hold to block frontal attacks; Press Down + Defense to crouch |
Characters feature a wide range of moves, including standing, jumping, dashing, back-attacks, crouching, and blocking. Enemies share the same capabilities and often have longer reach—reckless play will get you killed. Observing enemy patterns and using blocks to create counter-attack windows is the key to survival.
3.2 Magic and Item System
Magic is cast in two ways: Elves and Clerics consume their own spell slots, while Fighters and Dwarves must pick up magic rings to cast one-time spells. Spell slots do not recover automatically between stages; you must pick up scrolls or reach save points to replenish them.
Throwing weapons include daggers (fast, low damage), hammers (arcing trajectory, medium damage), arrows (straight piercing), and oil flasks (area-of-effect fire). Oil flasks are strategically vital—Troll bosses have regeneration abilities that only fire can stop, perfectly recreating the "Trolls fear fire" rule from D&D. Magic rings are not class-restricted; Fighters and Dwarves can use them, but they are single-use items.
IV. Stages and Boss Strategy
There are seven stages, some featuring branching paths. At forks in the road, players vote on which direction to take, meaning you cannot see all content in a single playthrough.
| Stage | Main Setting | Boss | Strategy Tip |
|---|---|---|---|
| 1 | Darokin Outskirts | Troll | Must finish with oil or Fireball to stop regeneration |
| 2 | Dark Forest/Ruined Village | Displacer Beast | Hitbox is offset from the visual model; use Lightning Bolt to confirm hits |
| 3 | Underground Caves | Black Dragon | Acid breath covers the screen; stand under the head to stay safe |
| 4 | Shadow Elf Dungeon | Shadow Elf | Teleportation and daggers are hard to interrupt; use Cleric's Hold Person |
| 5 | Swamp/Undead Graveyard | Beholder | Fires multiple rays; keep moving and don't stand still |
| 6 | Tower of Doom Lower | Flamewing (Hidden) | Appears under specific conditions; deals massive fire damage |
| 7 | Tower of Doom Summit | Archlich Deimos | Phase 1: Ranged spells/summons; Phase 2: Melee combat |
Flamewing is an ancient red dragon that only appears if you take specific paths and meet hidden conditions. Defeating it yields massive loot, but you cannot continue if you lose. The final boss, Deimos, has two phases: a ranged barrage with summoned skeletons, followed by a melee form. The key is to have the Elf and Cleric chip away from range in phase one, then have the Fighter and Dwarf swarm him in phase two.
V. Tips and Advanced Strategy
5.1 Survival Basics
-
Blocking is essential—Most damage can be negated by timely blocking. The Cleric's shield makes his block window the most forgiving; beginners should start with the Cleric or Fighter.
-
Master spacing—Enemies often have longer reach than you. Wait for them to whiff an attack, move in for a 2-3 hit combo, and retreat.
-
Don't hoard items—Many players save daggers and hammers for the final boss, only to die to minions mid-game. Use your items to clear threats as you go.
-
Plan your route—Check for shops and save points (which restore spell slots) when choosing paths. High-difficulty paths usually offer better rewards.
-
The ideal 4-player party—Fighter (Tank), Dwarf (Melee DPS), Elf (Crowd Control), Cleric (Support/Healer). The Cleric's Hold Person is a game-changer against agile bosses like the Shadow Elf.
5.2 Advanced Techniques
- Jump Attack Cancel: Input a normal attack the instant you land after a jump attack to cancel the recovery animation and transition directly into a ground combo.
- Infinite Dagger Loop (Elf): The Elf has the fastest throwing speed. With precise timing, you can throw daggers without delay for massive damage against large targets.
- Unarmed I-Frames: The Fighter's somersault and Dwarf's spinning axe have invincibility frames. High-level players often empty their inventory to unlock these moves for defensive maneuvering.
VI. Trivia and Arcade Lore
The Playtest Method: Writer Alex Jimenez used his D&D group as a testbed, narrating the plot as DM and recording player decisions. Capcom Japan used this to trim complex dice rolls while keeping iconic rules like "Trolls must be killed with fire." Jimenez later said, "My D&D group were likely the first people to ever beat the game, even though the version they played didn't have a single line of code yet."
The Two-Button War: The game was originally designed for two buttons, but the item and magic systems required more. Jimenez and the Japanese team debated for weeks—the Japanese side feared four buttons would alienate casual players, while the US side insisted it was necessary for D&D depth. The four-button layout won, paving the way for more complex sequels.
Critical vs. Commercial: The game ranked #2 on the Game Machine arcade charts in Japan in March 1994, while RePlay magazine ranked it the #1 most popular arcade game in North America, outperforming Raiden II and Fatal Fury Special due to the strong D&D brand presence.
The Saturn Saga: Capcom originally planned a 1998 port for Saturn and PS1, but canceled the PS1 version, eventually bundling it as the Dungeons & Dragons Collection. It launched exclusively in Japan in March 1999, requiring a 4MB RAM cartridge. While GameSpot criticized the "egregious" loading times, Retro Gamer praised the "stunning animation made possible by the 4MB cart." In 2013, Dungeons & Dragons: Chronicles of Mystara remastered both titles for PS3, Xbox 360, Wii U, and PC, adding online play and HD filters.